Creating an Event using 25Live
Overview:


Stepping Through the Event Form
1. Enter Basic Information
- Enter an Event Name, Event Title, select an Event Type, and complete the Primary Organization. If any of these fields are required, they are labeled as such.
- Web calendars (if set up for your 25Live instance) and searches display the Event Name.
- Permissions determine which Event Types you can choose from. Your chosen Event Type determines some options that appear later in the form.
- Some fields in this section search ahead as you type in them.
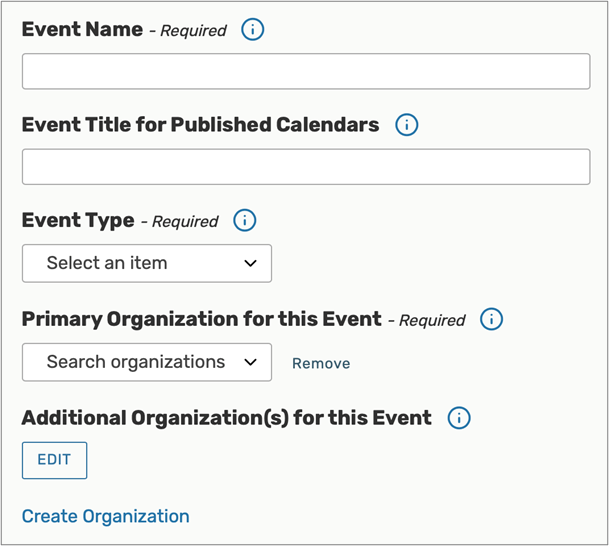
Image: Required fields are labeled on the Event Form.
You can Edit or Remove the Primary Organization or Additional Organization if displayed. If you cannot find the right organization, use the Create Organization link, if you have security permissions to do so.
|
Tip: The Information Icon Use the information ( ) icon to view additional help and/or instructions for any field that displays it. Some help section may be open to read by default, depending on your instance and configuration. |
2. Enter Attendance Information and Description
- Expected Head Count
- Registered Head Count
- 25Live can use the expected or registered head count to find locations that can hold your event.
- Event Description
- The Event Description can appear on web calendars if you intend to publish your event.
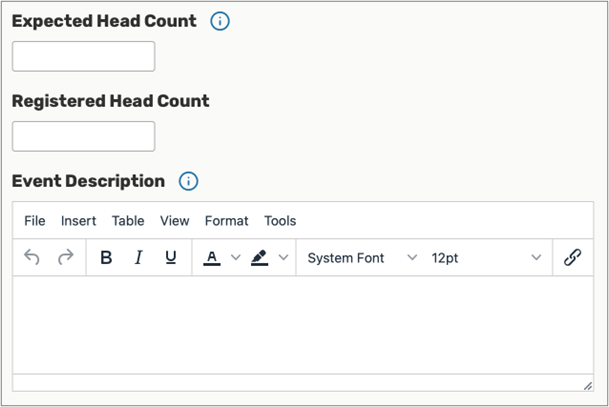
Image: The Event Description field allows you to format text with a variety of options.
|
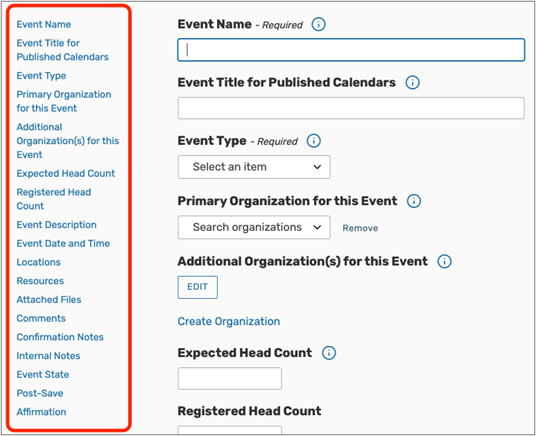
Tip: Use the Left Side Navigation to Move Around The Event Form features convenient side navigation to the left of the sections and fields. |
3. Enter Information About Your Event’s First Occurrence
Specify the date and times of the first occurrence of the event. If your event occurs on multiple days, you’ll describe how it repeats in the next section.
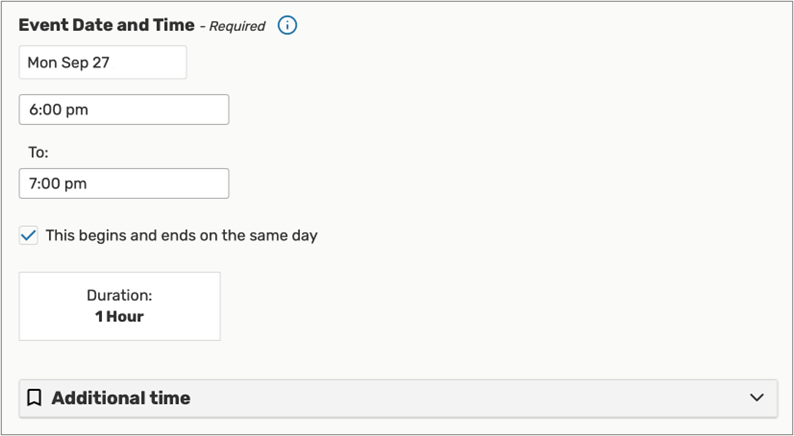
Image: Use the Additional Time section to add extra time to events, see Adding Additional Time to Events.
You have the option to create a single occurrence of a multi-day event by using the checkbox for This event begins and ends on the same day. When the box is unchecked, you can choose an end date, however, be aware that if this is a repeating event every subsequent occurrence will have the same multi-day duration.
If the event requires Setup/Pre-Event and/or Post-Event/Takedown time, select the options you need by opening the Additional time display, then set the number of days, hours, or minutes needed. See the Adding Additional Time to Events help topic.
|
Security Note System configuration and security determine whether you can use Setup, Pre-Event, Post-Event, and Takedown times for events. Ask your 25Live administrator if you're unable to perform functions you think should be available to you. |
4. Optionally Choose How Your Event Repeats
If your event has more than one occurrence, select how the event repeats. 25Live allows you to create repeating events defined as either ad hoc/random dates or as a pattern (daily, weekly, monthly).
- Tap or click on dates on the calendar to create random (or ad hoc) repeat occurrences
- You can also add additional, random dates after selecting and defining a pattern
- Or use the Repeating Pattern button to select the pattern type (including ad hoc dates) and complete its options, then use the Select Pattern button to save your choices
See the Creating Repeating Events help topic for details.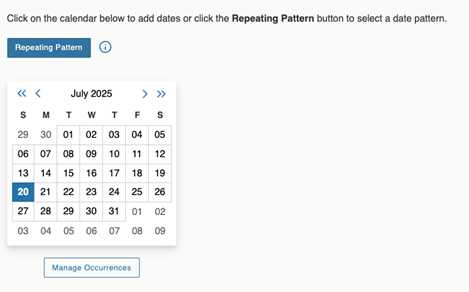
5. Select Location(s)
|
Tip: Location and Resource Section Can Collapse To help you view information more efficiently, you can expand or collapse the Location and Resource sections. |
Start with a Saved Search or search for suitable locations by location name.
- Check the Hide Conflicts or Enforce Headcount boxes to narrow results
- To use SeriesQL for an advanced search, start typing two colons ::
As you search, 25Live checks for the availability of location(s) at your specified dates/times.
- Use links in the Conflict Details column to view more information about location conflicts
- The links on location names allow you to view location details
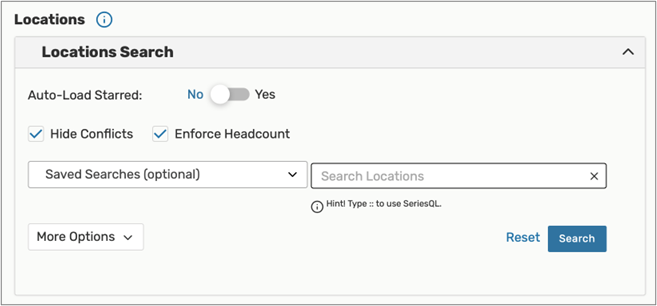
Image: Use the checkboxes above the search options to narrow results.
Use the Reserve (or Request) button to make selections. You may choose one or more available locations for your event. A selected location appears as a pending assignment in event details and in the location availability grid until you save the event.
Location Occurrence Editing
25Live allows you to adjust settings per occurrence for each requested or reserved location. After adding a location, collapse the search, then use the View Occurrences link to add instructions, specify layouts, and additional options.

Image: There is a View Occurrences button on every requested/reserved location block.
See the Adjusting and Editing Individual Event Occurrences help topic for more detail.
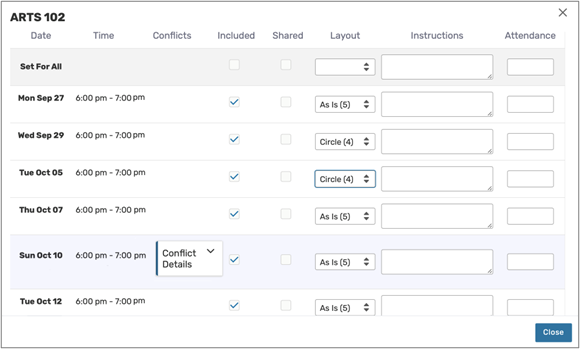
Image: Settings for location per occurrence.
|
Customization Note Depending on how your 25Live environment has been configured, assigning a location to your event may automatically assign the "Location Scheduler" to the Scheduler contact role for the event, or a Default Scheduler may be assigned based on your security group. (The Location Scheduler is specified for a location in the Administration Utility and displayed in location details on the 25Live Locations tab.) Your institution's business processes determine how you can proceed with submitting your event request when the event is auto-assigned another scheduler. If your user does not have permissions to view Contacts, some roles may not display. |
6. Select Resource(s)
Start with a saved search or search for desired resources by name.
- Use the More Options dropdown to add additional search parameters, such as Categories
- To use SeriesQL for an advanced search, start typing two colons ::
- As you search for them, 25Live checks automatically for the availability of the resource(s) at your specified dates/times
- Use the link(s) in the Conflict Details column to view more information about resource conflicts
- You can also view Quantity Availability
- The links on resource names allow you to view resource details
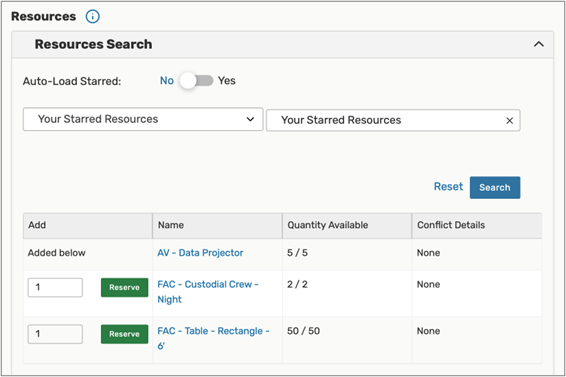
Image: Extra information about resources is shown in columns.
Use the Reserve (or Request) button to make selections. You may choose one or more available resources for your event.
Resource Occurrence Editing
25Live allows you to adjust settings per occurrence for each requested or reserved resource. After adding a resource, collapse the search, then use the View Occurrences link in the resource block below to add instructions, adjust the quantity, and change occurrence information. A selected resource appears as a pending assignment in event details and in the resource availability grid until you save the event. See the Adjusting and Editing Individual Event Occurrences help topic.

Image: There is a View Occurrences button on every requested/reserved resource block.
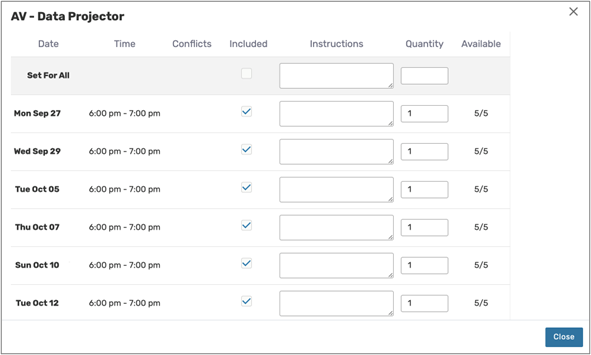
Image: Settings for resources per occurrence.
7. Attach File(s)
If your institution has configured and allowed file attachments for events, use the Upload a file button to optionally attach one or more files.
- You can attach up to 5 files
- Files may not exceed 25MB
- Allowed file types:
- PDF, TXT, RTF
- JPG, JPEG, PNG, GIF
- DOC, DOCX
- XSL, XSLX, CSV
You may also use this section to remove previously attached files from the event.
8. Enter Custom Attributes (If Displayed)
Select and enter values for any available custom attributes that are pertinent to your event. Custom attributes are different for each instance of 25Live. Use the No/Yes toggle(s) to add and complete any custom attributes.

|
Note: Some Sections Need an Event Type to Display If you do not see the Custom Attributes or Contact Roles sections, make sure you have selected an Event Type above. Additionally, some Event Types may not be configured to display these fields. |
9. Select Contacts
Select the contacts associated with the event. To specify a contact, use the dropdown icon, enter a few letters of the contact’s name, and select it when the full name displays. You can also add a contact by using the Create button then completing the displayed fields.
10. Complete Categories, Requirements, Calendars, Comments, and Notes
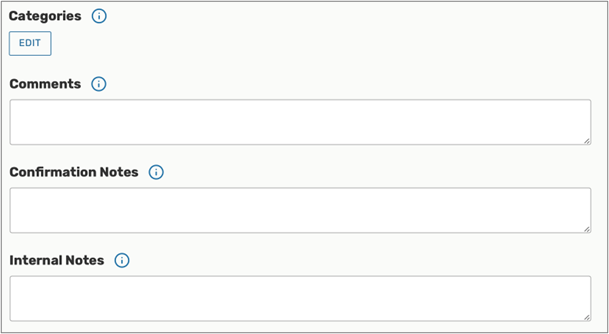
Image: Sections and fields for Categories, Requirements, Calendars, and Comments depend on how your 25Live instance is configured.
Across the next sections, you may see choices for categories, requirements, and calendars, comments, and notes depending on how the Event Form has been customized for your institution, 25Live instance, and security group.
- Categories: Select the categories the event belongs to. Categories help other users find events when searching and can determine if your event displays on web calendars
- Requirements: Use the toggle to add pertinent requirements, such as a liquor license or a contract, and add comments or quantity information as needed
- Calendars: If you are promoting your event on one or more web calendars, choose the calendar(s) here, and enter comments as needed
- Comments and Notes: Enter appropriate comments and/or notes for the event and keep important information at the top
- Event Comments can be seen by most users
- Confirmation Notes are shown in Confirmation Reports
- Internal Notes can be seen only by people who are event contacts, like Requestor and Scheduler
|
Comment and Notes Fields are Limited Comment and notes fields are limited to approximately 32,000 characters. To prevent truncated text:
|
11. Choose an Event State
Choose the appropriate state of your event. A few notes about event states (for more details, see the Choosing an Event State help topic):
- You have the option to set your chosen event state as your default for creating new events
- You may be required to save your event as a Draft, in which case any locations and/or resources you’ve requested will be saved as preferences, not assignments
- Tentative and Confirmed events can have assigned locations and resources
- The Denied, Cancelled, and Sealed event states are not available for new events and cannot be set as your default event state
If you're the event Scheduler or Requestor and you're able to save your event in a Tentative or Confirmed state, you become the event owner, with the right to edit, copy, or delete the event (unless a senior scheduler takes ownership of the event).
12. Choose Post-Saving Options
Convenient options are presented to allow you to choose your next action after saving your event in the After Saving This Event section.
- Go to Event Details (see the Viewing Event Details help topics)
- Create Another Related Event (see the Creating Related Events help topics)
- Create a Related Copy of This Event (see the Copying Related Events help topics)
15. Save Your Event
Use the Save button to complete event creation.
|
Warning: The Cancel Button Will Not Save Changes The Cancel button is always available at the bottom of the Event Form alongside Preview and Save, but be aware that using Cancel will not save any completed fields or changes. |
Additional Tips
- When you submit an event with a location or resource that you don't have permission to assign, the Event Preferences area in the Occurrences area of the event details view lets you know that the assignment has been saved as a preference and an assignment task request has been issued for the item.
- When you save an event in the Draft state, any location or resource assignments are saved as event preferences only. The locations or resources themselves are released for other assignments.
- The event reference number is displayed when the event is saved. You can use this later to quickly find the event.
